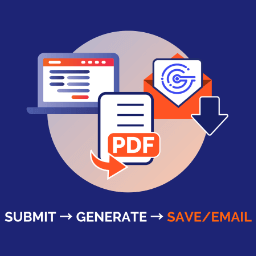
Gravity PDF
Gravity PDF is the ultimate third-party PDF automation tool for generating digital PDFs using the popular form-builder plugin Gravity Forms. Highly Customizable PDFs Out of the box you get four highly-customizable PDF designs. Within minutes, you can personalize the look and feel by adding your company logo, header, footer, paper size / orientation, font, color and size. If the free designs don’t suit, select from our range of templates in the Template Shop, go bespoke and have a template build by our team, or build your own using HTML/CSS/PHP. Send as Email Attachment Gravity PDF can automatically email the PDF to both the admin and the user as soon as the form is completed. You can combine this feature with a Gravity Forms payment add-on to sell personalized reports, gift certificates, or generate PDF invoices. Privacy, Security, and GDPR Gravity PDF generates PDFs on your web server, and no third-party service receives your sensitive Gravity Forms entry data. Robust security protects your documents, and the plugin is GDPR-compliant for our European friends. Digital document management with WordPress and Gravity Forms just became simple with Gravity PDF! Free Feature Unlimited Use, No Restrictions – There are zero hard limits to the number of PDFs you can configure across all your forms or generate on your entries. Gravity PDF does NOT stamp documents with our logo, limit the number of PDFs you can create per month, or purposefully restrict essential functionality to force you to upgrade to a paid plan. Privacy and Security – your form data is never sent to a third party to generate the PDFs and the documents are generated directly on your web server. Strong access control policies are put in place to prevent unauthenticated access to your PDFs. Multilingual – a multitude of languages from across the globe can be displayed in PDFs, include complex scripts like Hebrew, Arabic, Thai, Japanese, Chinese, and Korean. Additional Fonts – match your branding and enhance the overall look and feel of PDFs by install your own fonts. Columns – use Drag and Drop columns in Gravity Forms and PDFs will automatically mimic that layout. Shortcode and Merge Tags – You can generate a link or URL to PDFs using both shortcodes and merge tags so your users can download the PDF right after form submission. Export Entries – include the direct link to any PDF(s) when exporting your form entries Webhooks Add-on – send the direct PDF link with Webhook requests when using Gravity Forms Webhooks add-on. Gravity Flow – create complex workflows using Gravity Flow and automatically email Gravity PDF-generated documents at any step in the workflow. GravityView – add links to PDFs when building a members area using GravityView + Advanced Filtering add-on. Background Processing – generating PDFs on form submission can be time consuming. Offload it to a background process will ensure form submissions are processed faster. Design PDFs – developers can build their own PDF templates using HTML, CSS, and PHP with the help of our developer documentation. Documentation and Support – there is extensive documentation covering every feature of Gravity PDF that you can comb through, plus we provide free general support to all users. Unlock More Functionality Pay for additional PDF designs and functionality from our online store. New Designs – get access to 9 additional universal designs, 6 certificates, 6 invoices, and 3 letter styles Additional customizations – watermark PDFs with your own logo or text, control fields that should be displayed per PDF, add field descriptions, display all checkbox or radio field options, add notes, show field values instead of labels, and hide the product table On-screen Preview – allow users to preview the PDF before form submission (and optionally payment) so they can see what the end result will be. This is a great feature for capturing e-signatures, selling PDF reports / certificates / gift cards, or providing an on-screen proof before the PDF is sent to the printers (perfect for business cards). Bulk Download – search, filter, and select entries and then zip up all your PDFs and download all together in a convenient zip file Smart Loading Indicator – improve the UX for your users when generating complex PDFs that take time to create. GravityView – turn GravityView into a drag-and-drop PDF builder for your Single Entry View Layouts. GFChart – create PDF reports that display pie, bar, or column charts with aggregate Gravity Forms data using GFChart. 30-Day Refund Guarantee – Purchase with confidence knowing when you buy a product from our store that you can get a refund within 30 days, for any reason. Hire the Experts Need a tailor-made solution for Gravity PDF that solves complex business problems? Our team of experienced developers have helped thousands of businesses like yours to accomplish these goals. We can even fill existing PDFs like government forms, without sending your sensitive entry data to a third-party server! Find out more. Documentation & Support We have extensive documentation on using Gravity PDF, and our friendly support team provides FREE basic support via GravityPDF.com. Contribute All development for Gravity PDF is handled via GitHub. Opening new issues or submitting a pull request is welcome. Keep up to date with Gravity PDF by subscribing to the newsletter, following us on Twitter/X, subscribing to our YouTube channel, and liking us on Facebook. If you enjoy using the software we’d love it if you could give us a review!
Top keywords
- pdf25×2.82%
- gravity20×2.26%
- pdfs18×2.03%
- gravity pdf10×1.13%
- forms9×1.02%
- form7×0.79%
- gravity forms7×0.79%
- designs5×0.56%
- documentation5×0.56%
- support5×0.56%
- add-on4×0.45%
- additional4×0.45%
Smart Forms – when you need more than just a contact form
Smart Forms Want to see a demo? Click here Want to create a form with calculations? This is the best plugin for you And Here Is Why So you want to create a beautiful form, the problem is, you are not a developer and of course you have no time to learn any of that?, well, if that is you (or your client) this is the plugin for you. This plugin is focused in making really easy the process of creating your forms, with it you can add formulas to calculate totals (it doesn’t matter if your totals require complex calculations) or show the fields that you need just when you need them. Emailing is easy, you can even send different types of emails to different persons at the same time, again no coding needed at all since everything is configured in a friendly screen. You do know programing or web development? That’s fine!, even though it is not needed, because there is a friendly interface for everything, you can still use those skills to add custom css or javascript code into your form and tweak it as you want it. If you want to learn more keep reading, there is a list of features bellow, or even better check out the video tutorials here: http://smartforms.rednao.com/tutorials. I hope you like it =). Features: Responsive Forms– The forms adjust automatically to available space, making them look great in a pc or any device. Shortcode Forms– The forms can be easily added to any post or page using a shortcode or block. Forms Entry Screen– Easily view responses you can also edit them. Export to pdf or csv– Export the submitted information as pdf or csv. Customizable forms emails– After a form is submitted, send notification email with any information, and in any format that you need. Conditional emails– Configure a type of email to be send only when a condition is met Calculated forms fields– Formulas fill fields automatically (up to three fields per formula in the free version) Custom forms fields– The plugin currently supports these custom forms elements: name, phone, email, address, number, captcha (free version support up to 8 fields per form). File Uploader (pro)– Allows you to upload files in a form; you can configure the form to accept only one file or multiple files. Conditional Logic– Show and hide fields depending on values in other fields; allows you to have an all-in-one form all in one place, instead of in multiple pages; prevents forms from overwhelming users. Tons of icons to decorate your form– Create awesome forms with more than 200 icons; more coming soon. Style editor– Change the aspect of your form with the build-in style editor, or if you are a designer create your own css rules easily. JavaScript editor_ Create your own JavaScript code and customize your form exactly as you want it. Forms Compatible with Smart donations– – You can create paypal forms with this plugin, and also enjoy all the power of smart donations (https://wordpress.org/plugins/smart-donations/, a smart donation license is required). Multiple Step Forms(pro)– Split your forms in section, making them easier to understand and submit. Smart forms quick tutorials Special thanks to Designmodo – https://www.iconfinder.com/icons/115789/trash_icon#size=16 Installing Smart Forms 1. Upload smart forms to the /wp-content/plugins/ directory 2. Activate the item named ‘smart forms’ in the ‘Plugins’ menu in WordPress 3. Go to Smart Forms /Add new and create a new form 4. To add the form to a widget go to widgets and drag the smart form widget 5. To add the form to a post type [sform]formid[/sform] (example:[sform]1[/sform]), you can find the formid of your form on the form list Creating a new Forms 1. Follow “Installing Smart Forms” 2. Click in smart forms 3. Click in add new 4. Drag the forms elements that you want to display 3. (Optional) If you want to do an additional action after a form is submitted. Go to the forms after submit tab, you can: a)Send a notification email with the form information b)Show an alert with the text that you want. This alert is shown after the form was successfully saved. c)Redireect the user that submitted the form to another page. 4. Save the form. 5. After the form is saved you might want to add the form to a post (Follow “Add form to a post”) or add the form to a widget (Follow “Add form to a widget”) 6. For a video tutorial please visit the smart forms tutorial screen Add the form to a post 1. Follow “Installing Smart Forms” 2. Follow “Creating a new Form” to have your new form. 3. Go to a page or post 4. Click in the smart forms button 5. A pop up will show with the list of forms that you have created in Smart Forms. Select the form that you want. 6. Save the post. 7. When you visit the post the form will show up 8. For a video tutorial please visit the smart forms tutorial screen Add the form as a widget 1. Follow “Installing Smart Forms” 2. Follow “Creating a new Form” to have your new form. 3. Go to the widget configuration 4. You will see an Smart Forms widget, drag it to wherever you want to display the form 5. The widget will contain the list of all the forms that you have created with Smart Forms. 6. Select the form that you want 7. The widget will display the form 8. For a video tutorial please visit the smart forms tutorial screen Configuring forms notification email 1. Follow “Installing Smart Forms” 2. Click in smart forms 3. Click in add new 4. Drag the forms elements that you want 5. Go to edit email (in the forms after submit tab) 6. Configure the email as you want it. You can click in the field buttons to add form values 7. Put the emails that you want to be notified of a form submission in the “Send email to” box, you can also define a form field. 8. Save the form 9. For a video tutorial please visit the smart forms tutorial screen