Agnosia Bootstrap Carousel by AuSoft
Agnosia Bootstrap Carousel hooks the [gallery] shortcode with attribute type="carousel" in order to show a Bootstrap Carousel based on the selected images and their titles and descriptions. This plugin assumes either your theme includes the necessary Bootstrap javascript and CSS files to display the carousel properly, or that you have included those files on your own. It will not include the files for you, so if they are not present, the carousel will not work and you will only obtain its bare HTML. Basic example: [gallery type="carousel" ids="61,60,59"] Required attributes: type: it needs to be type="carousel". ids: you must provide a list of ids corresponding to attachments, like ids="1,2,3". Otherwise, the default [gallery] shortcode function will be processed instead of this plugin’s one. Optional attributes: name: any name. String will be sanitize to be used as an HTML ID. Recommended when you want to have more than one carousel in the same page. Default: agnosia-bootstrap-carousel. Example: [gallery type="carousel" ids="61,60,59" name="myCarousel"] indicators: indicators position. Accepted values: before-inner, after-inner, after-control, false (hides indicators). Default: before-inner. Example: [gallery type="carousel" ids="61,60,59" indicators="after-inner"] width: carousel container width, in px or %. Default: not set. Example: [gallery type="carousel" ids="61,60,59" width="800px"] height: carousel item height, in px or %. Default: not set. Example: [gallery type="carousel" ids="61,60,59" height="400px"] titletag: define HTML tag for image title. Default: h4. Example: [gallery type="carousel" ids="61,60,59" titletag="h2"] wpautop: auto-format text. Default: true. Example: [gallery type="carousel" ids="61,60,59" wpautop="false"] title: show or hide image title. Set false to hide. Default: true. Example: [gallery type="carousel" ids="61,60,59" title="false"] text: show or hide image text. Set false to hide. Default: true. Example: [gallery type="carousel" ids="61,60,59" text="false"] containerclass: extra class for carousel container. Default: not set. Example: [gallery type="carousel" ids="61,60,59" containerclass="container"] itemclass: extra class for carousel item. Default: not set. Example: [gallery type="carousel" ids="61,60,59" itemclass="container"] captionclass: extra class for item caption. Default: not set. Example: [gallery type="carousel" ids="61,60,59" captionclass="container"] control: control arrows display. Accepted values: true (to show), false (to hide). Default: true. Example: [gallery type="carousel" ids="61,60,59" control="false"] interval: the amount of time to delay between automatically cycling an item. If false, carousel will not automatically cycle. Default: 5000. Example: [gallery type="carousel" ids="61,60,59" interval="2000"] pause: pauses the cycling of the carousel on mouseenter and resumes the cycling of the carousel on mouseleave. Default: “hover”. Example: [gallery type="carousel" ids="61,60,59" interval="hover"] size: size for image attachment. Accepted values: thumbnail, medium, large, full. Default: full. See wp_get_attachment_image_src() for further reference. Example: [gallery type="carousel" ids="61,60,59" size="full"] Native supported attributes: orderby: Alternative order for your images. Example: [gallery type="carousel" ids="61,60,59" orderby="rand"] link: where your image titles will link to. Accepted values: file, none and empty. An empty value will link to your attachment’s page. Example: [gallery type="carousel" ids="61,60,59" link="file"] Extending This plugin offers hooks for actions and filters, so you can modify its functionality or add your own. Action hooks: agnosia_bootstrap_carousel_before_init: Do something before the carousel is loaded. agnosia_bootstrap_carousel_init: Do something after the carousel is loaded. Filter hooks: agnosia_bootstrap_carousel_attributes: Modify the attributes passed to the shortcode. agnosia_bootstrap_carousel_posts: Modify the $post objects that the shortcode is using. agnosia_bootstrap_carousel_container_style: Modify the carousel container style. agnosia_bootstrap_carousel_item_style: Modify the style of the carousel items. agnosia_bootstrap_carousel_output: Modify the full HTML output of the carousel. agnosia_bootstrap_carousel_container: Modify the HTML output of the carousel container tag. agnosia_bootstrap_carousel_inner: Modify the HTML output of the carousel inner tag. agnosia_bootstrap_carousel_caption_container: Modify the HTML output of the caption container tag. agnosia_bootstrap_carousel_img_container: Modify the HTML output of the image container tag. agnosia_bootstrap_carousel_img: Modify the HTML output of the item image tag. agnosia_bootstrap_carousel_excerpt: Modify the HTML output of the image caption. agnosia_bootstrap_carousel_indicators: Modify the HTML output of the indicators element. agnosia_bootstrap_carousel_control: Modify the HTML output of the control element. agnosia_bootstrap_carousel_javascript: Modify the output of the carousel Javascript. agnosia_bootstrap_carousel_make_array: Modify the list of $post IDs that the carousel is using. Contributing You can make suggestions and submit your own modifications to this plugin on Github. For more information, visit our website.
Contact Form Clean and Simple
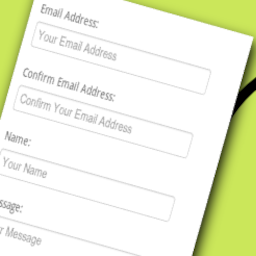
A clean and simple AJAX contact form with Google reCAPTCHA, flexible CSS framework support, spam filtering, and REST API support for headless WordPress implementations. Clean: all user inputs are stripped in order to avoid cross-site scripting (XSS) vulnerabilities. Simple: AJAX enabled validation and submission for immediate response and guidance for your users (can be switched off). Flexible Styling: Choose your CSS framework – Bootstrap (default), Theme Native (inherits your theme’s styles), or Minimal (semantic classes for complete custom styling). REST API Support: Enable headless WordPress implementations to submit forms via authenticated REST API endpoints. Accessible: Built with accessibility in mind – proper ARIA attributes, keyboard navigation, screen reader support, and WCAG AA compliant color contrast. This is a straightforward contact form for your WordPress site. There is very minimal set-up required. Simply install, activate, and then place the short code [cscf-contact-form] on your web page. A standard set of input boxes are provided, these include Email Address, Name, Message and a nice big ‘Send Message’ button. When your user has completed the form an email will be sent to you containing your user’s message. To reply simply click the ‘reply’ button on your email client. The email address used is the one you have set up in WordPress under ‘Settings’ -> ‘General’, so do check this is correct. To help prevent spam all data is scanned can be scanned with Fullworks Anti Spam Pro. For this to work you must have the Fullworks Anti Spam Pro Plugin installed and activated. Fullworks Anti Spam Pro will also log all your messages, categorized as spam or not, automatically. For added piece of mind this plugin also allows you to add a ‘reCAPTCHA’. This adds a picture of a couple of words to the bottom of the contact form. Your user must correctly type the words before the form can be submitted, and in so doing, prove that they are human. Why Choose This Plugin? Granted there are many plugins of this type in existence already. Why use this one in-particular? Here’s why: Minimal setup. Simply activate the plugin and place the shortcode [cscf-contact-form] on any post or page. Safe. All input entered by your user is stripped back to minimise as far as possible the likelihood of any malicious user attempting to inject a script into your website. If the Fullworks Anti Spam Pro plugin is activated all form data will be scanned for spam. You can turn on reCAPTCHA to avoid your form being abused by bots, however Fullworks Anti Spam Pro will do this without reCAPTCHA. Ajax enabled. You have the option to turn on AJAX (client-side) validation and submission which gives your users an immediate response when completing the form without having to wait for the page to refresh. The form can integrate seamlessly into your website. Turn off the plugin’s default css style sheet so that your theme’s style sheet can be used instead. Flexible CSS styling: Choose from Bootstrap, Modern (with dark mode), Theme Native, or Minimal styling modes to match your site’s design. This plugin will only link in its jQuery file where it’s needed, it will not impose itself on every page of your whole site! Works with the latest version of WordPress. Original plugin written by an experienced PHP programmer, Megan Nicholas, the code is rock solid, safe, and rigorously tested as standard practice. Headless WordPress ready. REST API support allows you to submit forms from decoupled frontends, mobile apps, or any external application with proper authentication. Hopefully this plugin will fulfil all your needs. PHP 8 Ready Tested on PHP 8.4 How to Use Unless you want to change messages or add reCAPTCHA to your contact form then this plugin will work out of the box without any additional setup. Important: Check that you have an email address set-up in your WordPress ‘Settings’->’General’ page. This is the address that the plugin will use to send the contents of the contact form. To add the contact form to your WordPress website simply place the shortcode [cscf-contact-form] on the post or page that you wish the form to appear on. If you have Jetpack plugin installed disable the contact form otherwise the wrong form might display. Additional Settings This plugin will work out of the box without any additional setup. You have the option to change the default messages that are displayed to your user and to add reCAPTCHA capabilities. Go to the settings screen for the contact form plugin. You will find a link to the setting screen against the entry of this plugin on the ‘Installed Plugins’ page. Here is a list of things that you can change Message: The message displayed to the user at the top of the contact form. Message Sent Heading: The message heading or title displayed to the user after the message has been sent. Message Sent Content: The message content or body displayed to the user after the message has been sent. CSS Framework: Choose how the form is styled: Bootstrap (Default): Uses Bootstrap CSS classes for full Bootstrap compatibility. Best for themes already using Bootstrap. Modern (Card style): A beautiful, opinionated modern design with card-style layout, large inputs, and CSS variables for easy customization. Includes automatic dark mode support. Theme Native: Uses minimal classes with WordPress’s wp-element-button for the submit button. The form inherits your theme’s native form styles. Minimal: Uses semantic CSS classes only (cscf-field, cscf-input, etc.) for complete custom styling control. Use this plugin’s default stylesheet: The plugin comes with a default style sheet to make the form look nice for your user. Untick this if you want to use your theme’s stylesheet instead. The default stylesheet will simply not be linked in. This option is most relevant when using the Bootstrap CSS framework. Use client side validation (Ajax): When ticked the contact form will be validated and submitted on the client giving your user instant feedback if they have filled the form in incorrectly. If you wish the form to be validated and submitted only to the server then untick this option. Use reCAPTCHA: Tick this option if you wish your form to have a reCAPTCHA box. ReCAPTCHA helps to avoid spam bots using your form by checking that the form filler is actually a real person. To use reCAPTCHA you will need to get a some special keys from google https://www.google.com/recaptcha/admin/create. Once you have your keys enter them into the Public key and Private key boxes reCAPTCHA Public Key: Enter the public key that you obtained from here. reCAPTCHA Private Key: Enter the private key that you obtained from here. reCAPTCHA Theme: Here you can change the reCAPTCHA box theme so that it fits with the style of your website. Recipient Emails: The email address where you would like all messages to be sent. This will default to the email address you have specified under ‘E-Mail Address’ in your WordPress General Settings. If you want your mail sent to a different address then enter it here. You may enter multiple email addresses by clicking the ‘+’ button. Confirm Email Address: Email confirmation is now optional. To force your user to re-type their email address tick ‘Confirm Email Address’. It is recommended that you leave this option on. If you turn this option off your user will only have to enter their email address once, but if they enter it incorrectly you will have no way of getting back to them! Email Subject: This is the email subject that will appear on all messages. If you would like to set it to something different then enter it here. Override ‘From’ Address: If you tick this and then fill in the ‘From Address:’ box then all email will be sent from the given address NOT from the email address given by the form filler. **Option to allow enquiry to email themselves a copy of the message. Contact consent: This option allows you to be GDPR compliant by adding a ‘Consent to contact’ check box at the bottom of the form. Enable REST API: Turn on REST API support to allow headless WordPress implementations to submit forms. Required User Capability: Set the minimum WordPress user capability required to use the REST API (default: edit_posts). REST API for Headless WordPress This plugin includes REST API support, making it perfect for headless WordPress implementations, mobile applications, and decoupled frontend frameworks like React, Vue.js, or Angular. Enabling REST API Go to the plugin settings page Find the “REST API Settings” section Check “Enable REST API” Set the required user capability (default: edit_posts) Save your settings API Endpoint POST /wp-json/cscf/v1/submit Authentication The REST API requires WordPress user authentication. Users must be logged in and have the capability specified in settings (default: edit_posts). For headless implementations, you can use: – Application Passwords (WordPress 5.6+) – JWT Authentication plugins – OAuth plugins – Basic Authentication (development only) Request Format Send a POST request with JSON body: `json { “name”: “John Doe”, “email”: “john@example.com”, “confirm_email”: “john@example.com”, “message”: “Your message here”, “phone_number”: “+1234567890”, “contact_consent”: true, “email_sender”: false, “post_id”: 123 } ` Required fields: – name: Sender’s name – email: Sender’s email address – message: The message content Optional fields: – confirm_email: Required if email confirmation is enabled in settings – phone_number: Required if phone number is set as mandatory in settings – contact_consent: Required if contact consent is enabled in settings – email_sender: Set to true to send a copy to the sender – post_id: The ID of the page/post where the form would normally be displayed Response Format Success Response (200): json { "success": true, "message": "Message Sent" } Validation Error Response (400): json { "code": "validation_failed", "message": "Validation failed.", "data": { "status": 400, "errors": { "email": "Please enter a valid email address.", "message": "Please enter a message." } } } Authentication Error Response (401): json { "code": "rest_forbidden", "message": "Authentication required.", "data": { "status": 401 } } Example Implementation JavaScript (fetch API): `javascript const formData = { name: “John Doe”, email: “john@example.com”, confirm_email: “john@example.com”, message: “This is a test message from the REST API” }; fetch(‘https://yoursite.com/wp-json/cscf/v1/submit’, { method: ‘POST’, headers: { ‘Content-Type’: ‘application/json’, ‘Authorization’: ‘Bearer YOUR_AUTH_TOKEN’ }, body: JSON.stringify(formData) }) .then(response => response.json()) .then(data => { if (data.success) { console.log(‘Message sent successfully!’); } else { console.error(‘Validation errors:’, data.data.errors); } }); ` Important Notes REST API is disabled by default for security reCAPTCHA is bypassed for REST API submissions (authentication provides security) All other form validations and spam filtering still apply Form submissions via REST API are processed identically to regular submissions Email notifications work the same way as standard form submissions Demo Demo site coming soon.